English
🛠️ API & Development
This section is aimed at developers who want to integrate AISSIST via the API.
🔗 Swagger / API Documentation
The complete interactive API reference is accessible via Swagger UI:
The Swagger documentation covers all REST endpoints and contains examples for request/response structures, authentication and error codes.
🤖 Agents API Documentation
The documentation for the Agent API (General Purpose Agent) is available separately:
This documentation describes the endpoints for using agents.
🔐 Getting Access
Access to the AISSIST API is via JWT tokens, which must be sent in the Authorization header as a Bearer token.
Example HTTP header:
Authorization: Bearer <JWT_TOKEN>.
- The JWT token contains the permissions (scopes/roles) that your application needs to call the respective endpoints.
- A JWT token with the appropriate rights can be requested from your respective AISSIST contact within the company.
- Keep the token secure and do not share it in client-side code or publicly accessible repositories.
🔑 AISSIST API – Extracting a temporary JWT token for Swagger tests
Short documentation for developers.
Goal: With a temporary access token, API endpoints can be tested directly via the Swagger documentation on the productiv system. A separate activation is always required to extend the rights of the permanent, productive tokens for the respective applications.
1. Relevant Systems
- Environment: Always perform developments and tests on the staging system.
- Frontend: https://aissist.bv.burda.com/
- Swagger Documentation: https://aissist-backend.bv.burda.com/docs
- API Documentation: https://aissist-documentation.bv.burda.com/dev/overview
2. General Process
- Testing and development take place with a temporary token on the staging system.
- The temporary token is extracted from the logged-in frontend and used in Swagger.
- If individual endpoints are to be used in production systems, they must be specifically activated and authorized.
Activation for Production Use
Important
For production endpoints, a request via the central Burda Forward contact persons is required.
The request should include at least:
- Name of the production token
- Desired endpoint(s)
- Desired date for activation (recommended: at least two weeks' notice)
3. Extracting a Temporary JWT Token
- Log in to the frontend.
- Open developer tools: Right-click and "Inspect". The term may vary slightly depending on the browser.
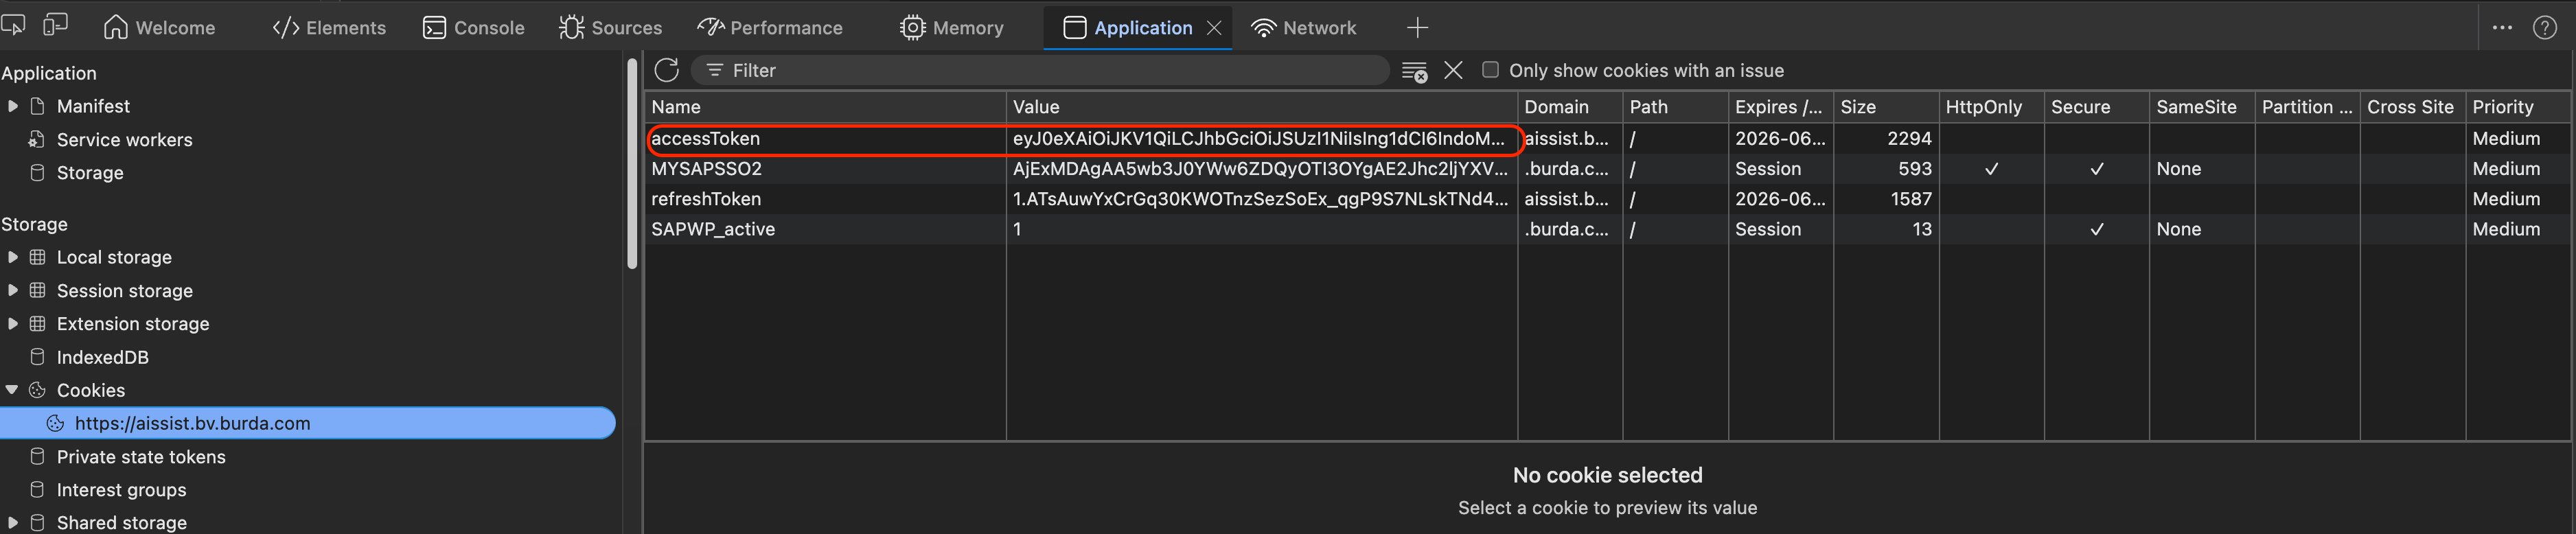
- Copy token: In the "Application" tab, select the respective application in the "Cookies" section and copy the value of the
accessToken. - Use in Swagger: Paste the copied token at the top of the Swagger documentation via Authorize.
This temporarily unlocks approximately 95% of the existing API endpoints for direct testing.
Validity
The extracted access token is valid for a maximum of two hours.
📊 Technical Limits
The AISSIST API is protected by various technical limits to ensure stability and fair use.
Request Limits (Rate Limiting)
The following standard limits currently apply per user:
- maximum 120 requests per minute
- maximum 4,800 requests per hour
This rate limiting policy is active and is automatically enforced.
- These request limits per time window apply per client / API key / user account.
- If the limits are exceeded, the following responses may occur:
- HTTP 429 – Too Many Requests
Payload Sizes
- For requests (particularly for file uploads or extensive JSON bodies), there is a maximum payload limit of
1 GB. - If a request exceeds this limit, the API may respond with HTTP 413 – Payload Too Large
Timeouts & Response Times
- Requests that take longer than the currently defined timeout of
300smay be aborted. - Plan in your client:
- Robust error handling (timeouts, retries with backoff).
- Appropriate client-side timeouts that match the API.
Best Practices for Handling Limits
- Implement client-side caching where appropriate.
- Log 429 and 5xx errors to detect possible limit exceedances early.
- For persistently high loads, contact your AISSIST contact to clarify suitable quotas or adjustments.
📋 API Changes per Version
Version-accompanying API changes are documented on a separate page for each version.