English
Chat (formerly Free Text)
In Chat, you can work directly with a language model without a predefined use case. Open Create in the top-left corner and select Chat under Text. Enter your task in the prompt field (Fig. 1, no. 1), select the desired model at the bottom (Fig. 1, no. 2) and send the message using the arrow (Fig. 1, no. 3). The plus icon opens file upload (Fig. 1, no. 4).
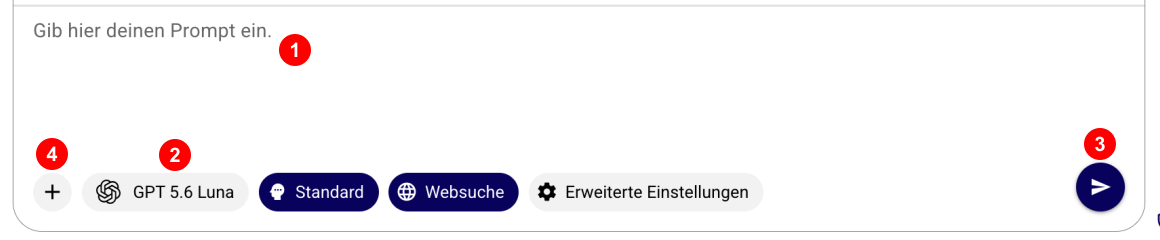
Figure 1: Chat input area with the main controls.
Selecting a model
Click the model name to open the selection. When you hover over an entry (Fig. 2, no. 1), an information card appears with the model's description, capabilities and strengths (Fig. 2, no. 2). This allows you to compare the available models. The model selection may change.
Chat remembers the last model you selected and uses it automatically in new chats.
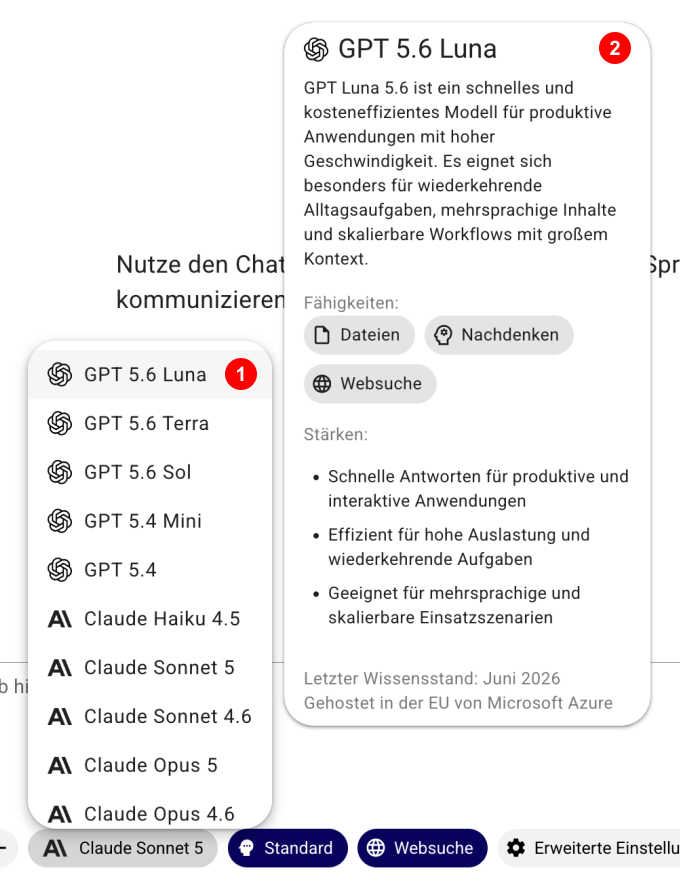
Figure 2: Model selection and information card for GPT 5.6 Luna in an empty chat.
Editing and copying messages
You can copy your own messages using the copy icon (Fig. 3, no. 1) or edit them using the pencil (Fig. 3, no. 2).
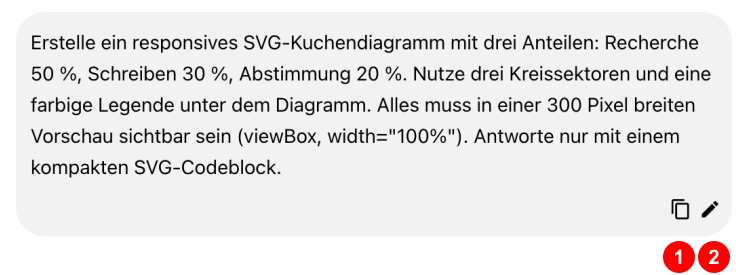
Figure 3: Actions available for your own chat message.
Adapt the text in the editing field (Fig. 4, no. 1). Select Cancel to discard the change (Fig. 4, no. 2), or Confirm to resend the changed message (Fig. 4, no. 3).
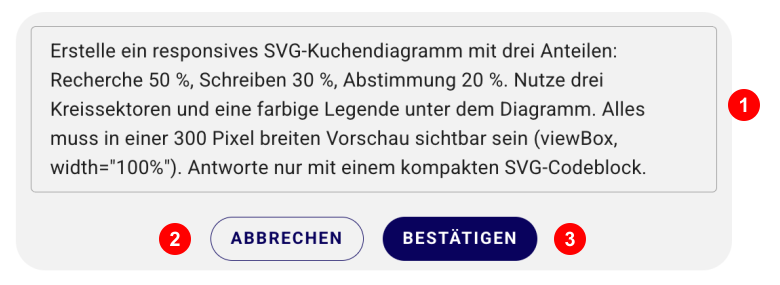
Figure 4: Edit and resend your own message.
For model responses, use the arrow next to the copy icon to open format selection (Fig. 5, no. 1). Select Text (Fig. 5, no. 2) or Markdown (Fig. 5, no. 3) to copy the response in the required format.
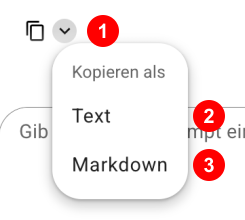
Figure 5: Select the format when copying a model response.
HTML and SVG preview
The following example shows an SVG pie chart with three unequal segments: Research 50%, Writing 30% and Coordination 20%. A coloured legend assigns the segments.
Example prompt:
Create a responsive SVG pie chart with three segments: Research 50%, Writing 30%, Coordination 20%. Use three circular sectors and a coloured legend below the chart. Everything must be visible in a 300-pixel-wide preview (viewBox, width="100%"). Respond only with a compact SVG code block.
If a model response contains an HTML or SVG code block, use the preview icon to switch to the rendered view (Fig. 6, no. 1). The copy icon copies the code (Fig. 6, no. 2).
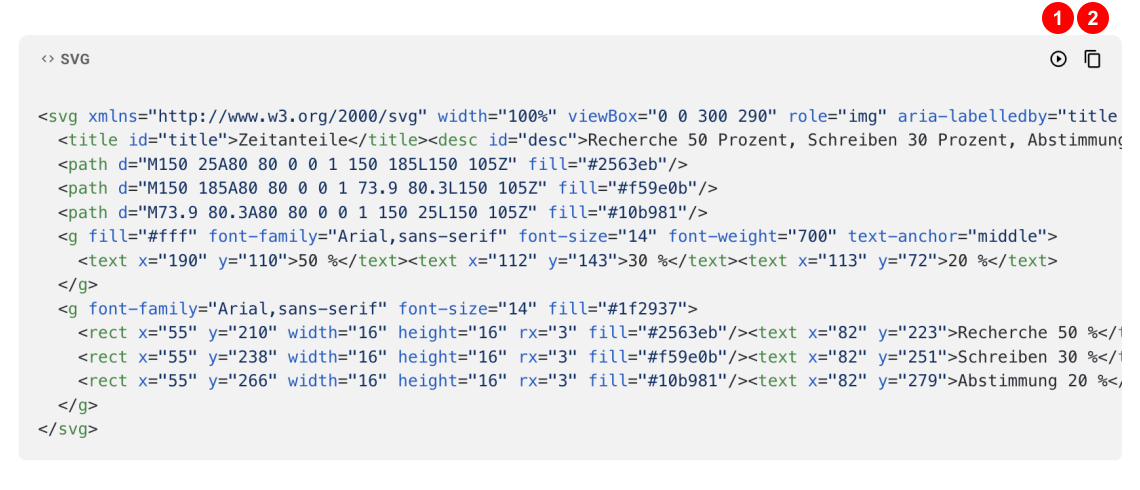
Figure 6: SVG code for the pie chart with preview toggle and copy function.
In the preview, use the code icon to return to the source code (Fig. 7, no. 1). You can also open the preview in full screen (Fig. 7, no. 2), download the HTML or SVG content as a file (Fig. 7, no. 3) or copy it (Fig. 7, no. 4).
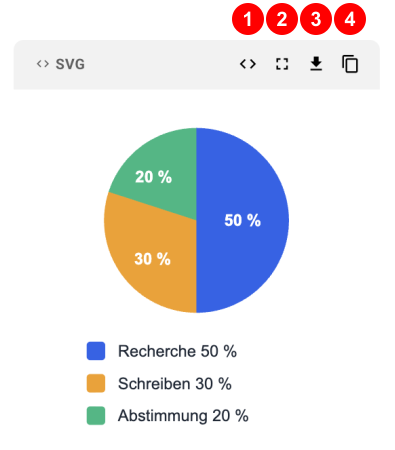
Figure 7: SVG preview with Research (50%), Writing (30%) and Coordination (20%), plus actions for further use.
Document manager
Use the plus icon (Fig. 1, no. 4) to select files from your directory. Alternatively, drag files into the chat window. This makes images and documents available to AISSIST for your requests.
All chats use the same multimodal file processing. You can add PDF, DOCX, TXT, XLS, XLSX, CSV, HTML, JSON, Markdown (.md), RTF, XHTML, XML, as well as PNG, JPEG and WebP images.
Activating and deactivating sources
After upload, files appear above the prompt field. Use the toggle on a file to activate or deactivate that source (Fig. 8, no. 1). Activate All (Fig. 8, no. 2) and Deactivate All (Fig. 8, no. 3) control all files at once.
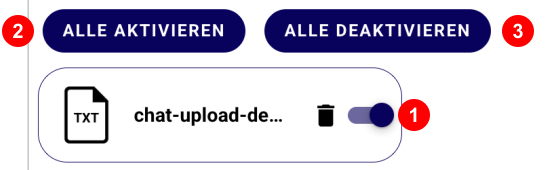
Figure 8: Activate and deactivate individual or all uploaded sources.
Filtering and searching files
Use the filters to narrow down the displayed files:
- Under Files, choose All or only Active (Fig. 9, no. 1).
- Under File Type, filter by PDF, IMG or XLSX; All clears the type filter (Fig. 9, no. 2).
- Search finds files by their name or part of their name (Fig. 9, no. 3).

Figure 9: Narrow down files by activation, file type and file name.
Removing files and checking document knowledge
Use the bin icon on a file to remove it from the chat (Fig. 10, no. 1). If you only want to exclude a source temporarily, deactivate it instead.
Document Knowledge shows how much of the context window is in use (Fig. 10, no. 2). This limits how much information the AI can consider at the same time. The info note explains the capacity and also specifies a maximum total size of 100 MB and 20 files at once. A very small file can still display as 0% because the value is rounded.

Figure 10: Remove a file and read the document knowledge usage.
Tip: The model can access a source only while it is active. If you deactivate an image before sending your next message, that image is no longer available for the follow-up request.
Tip: Refer to images in follow-up requests as “Image 1”, “Image 2”, and so on. The numbering counts images only. PDFs or other file types uploaded between them are not counted.